I. Introduction
Linear shower drain is not only a part of the shower for a necessary function, but a stylistically significant element that reveals the principles of modern minimalism. Nonetheless, the success of the procedure that followed to install the linear drain depends on the linear shower drain measurements taken. If the calculated dimensions are off or the slopes are wrong, one may expect that there will be pool formation, that water will not drain as it should, and more unnecessary work that would be costly in the long run to fix. This guide provides you with all the information about linear shower drain measurements to enable you to design a functional and aesthetically pleasing shower space.
II. Understanding Linear Shower Drain Measurements
Linear shower drains are available in several standard dimensions and installations to match various shower styles. Here are the most common dimensions:
- Length: 24 inches, 28 inches, 32 inches, and up to 72 inches in rooms with larger dimensions.
- Width: Usually, it ranges from 2.75 inches for most models.
- Thickness: This should be approximately 1.55 mm thick so that it is not too weak yet not too thick to be bulky.
- Outlet Diameter: Usually 2 inches so as to interconnect with normal water piping systems.
These dimensions may differ from brand to brand or model to model, but they give a good starting point to work on when installing.
The Role of Slope in Shower Drainage
Proper slopes on the floor are very important, especially in order to ensure that water is easily channeled to the drain areas. The recommended slope for shower floors is between 2–4%, which translates to:
- If the distance from the enclosure to the drain is more than a couple of feet, a drop of ¼–½ inch per 12 inches.
This gives a gentle gradient that makes water to flow as it should without forming pools, even if one is in a shower.
III. Planning for Accurate Linear Shower Drain Measurements
1. Measuring for a New Installation
Steps for Accurate Measurement:
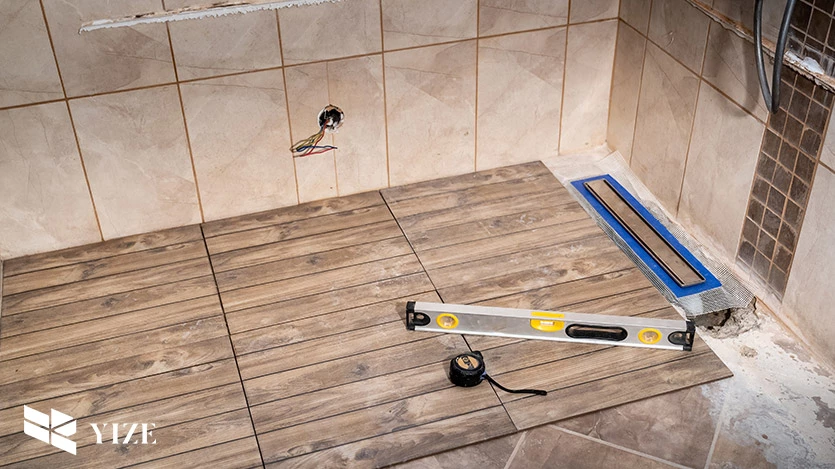
- It is also important to measure the width and the length of the shower floor.
- Determine the desired position of the drain location to be center or on any of the sides.
- Calculate the needed rise for the distance between the enclosure and the drain.
Tools Needed:
- Measuring tape
- Level
- Paper and pencils for drawing out plans
2. Replacing an Existing Linear Shower Drain
If you’re replacing a drain, start by removing the old one and measuring its dimensions:
- Take those measurements with regard to the length and width of dthe rain which is already installed.
- This way, ensure that the outlet diameter of the sink matches the plumbing of your house.
- Check the slope of the floor, as it should be between 2 and 4 percent.
IV. How to Choose the Right Linear Shower Drain Dimensions

1. Factors to Consider When Selecting a Drain
- Shower Size: It may also be necessary to provide longer drain time because of a bigger shower head or a wider shower area.
- Placement: For the chosen placement, decide the appropriate length, to be either along a wall or in the middle.
- Plumbing Compatibility: Make sure the outlet diameter is appropriate for your current pipe system if you’re using it.
- Aesthetic Preferences: The width and length of the drain should coordinate with your shower tile design.
2. Custom vs. Standard Linear Shower Drains
It should be noted, however, that for most showers, using standard sizes is appropriate, although custom drains suit complex shower designs. Custom options allow you to:
- Ideal for fitting irregular shape showers.
- Reveal particular matching of tastes in view of aesthetic appeal.
- Make corrections to slopes or layouts that are not standard.
V. Installation Tips for Linear Shower Drains
1. Preparing for Installation
Steps to Prepare:
- The shower area should also be cleaned such that no debris is found there.
- It is very important to double-check every measurement that has been taken, whether it is the floor slop or drainage system.
- If the drain is to be installed, this must be marked to determine where the best place is for it to be put.
Tools and Materials:
- Level
- Saw for cutting tiles or subfloor
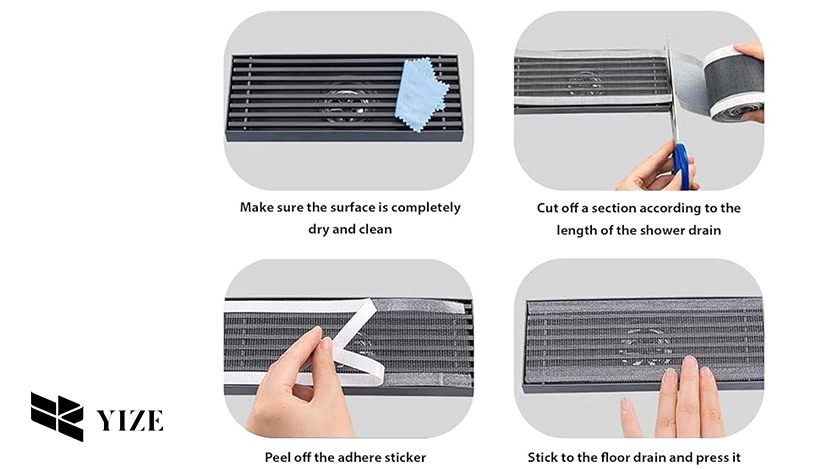
- Waterproof membrane
- Sealant and adhesive
2. Ensuring Proper Slope During Installation
To achieve the correct slope:
- Level the incline as you install the floor tiles with the help of a level.
- It is recommended to start tiling from the drain in addition to always maintaining a gently sloping position.
- Make sure that the measurements do not lead to the formation of water pools.
3. Common Challenges During Installation
- Incorrect Slope: Causes formation of stagnant water and poor water draining system.
- Mismatched Dimensions: Of course, this leads to the creation of gaps or a faulty design that does not fit right.
- Improper Sealing: It requires roof replacement, which can lead to leaks and, therefore, water damage.
To prevent such problems, one should measure carefully or follow the manufacturer’s instructions on measuring.
VI. Maintaining Your Linear Shower Drain After Installation

1. Regular Maintenance Tips
- Take your time occasionally to clear the drain with the hair, soap scum, and other debris that may build up in this area.
- Check for possible wear out or the appearance of stains around the drain and tiles that seem to cause water dripping.
- When cleaning the drains, ensure that you use a cleaner that will not be too harsh for the finish of the drain.
2. Preventing Future Issues
(1)Installing a Drain Screen:
- Keep hair and debris out of the bathroom basin before they reach the drain.
- Deep clean less frequently, and avoid cases of a clog.
(2)Routine Checks:
- Make sure the current floor slope is maintained in order to keep the structural integrity of the building when constructed.
- Where the tile meets the bathtub or shower, look for signs of cracks to the tiles or chips.
VII. Why YZDRAIN Is a Top Choice for Linear Shower Drains
1. Features of YZDRAIN’s Products
YZDRAIN also has a variety of linear shower drain products manufactured with precision and efficiency being valued greatly. Key features include:
- Designed with adjustable length in order to fit into particular and peculiar shower plans.
- Robust with a high degree of wear and tear and chemical resistance.
- Modern finish to complement any existing bathroom theme.
2. Customer Reviews
According to builders and homeowners, YZDRAIN is extremely durable and quite simple to install. Some note the fact that the brand pays great attention to the measurements of water and compatibility with household plumbing structures.
VIII. Conclusion
Correct measurements and installation of the linear shower drain comprise one of the most important steps to ensure a perfectly functioning and beautiful shower. Knowing standard dimensions, slope necessities and installation recommendations will help you detect mistakes and use the proper way of shower usage. From new installations to the replacement of an existing drain, YZDRAIN is a product that will provide you with what you need.
Frequently Asked Questions (FAQs)
Q1: What is the standard length of a linear shower drain?
They vary commonly between 24 inches and 72 inches, with common options including 28″, 32″, and 48″ lengths, depending on the shower size and design; however, custom sizes are also available by YZDRAIN to suit specific needs.
Q2: How wide are linear shower drains?
The standard width is normally 2.75 inches.
Q3: What slope is needed for a linear shower drain?
The preferred slope is 2-4%, or 1/4 to 1/2 inch of drop per foot.
Q4: How far off the wall should a linear drain be?
The distance between the linear drain and the wall is important for proper drainage. Typically, the drain should be placed 1 to 3 inches from the wall. This allows water to flow towards the drain without pooling at the far edges of the shower floor. Placing the drain too close to the wall can cause water to accumulate at the opposite end, leading to drainage problems.
