I. Introduction
An appropriately installed shower pan delivers excellent drainage service and protects from leaks to enhance your shower area. Our guideline provides step-by-step instructions, from selecting a proper pan to completing the sealing process. Regardless of your experience level, following these steps will lead to professional outcomes. Let’s get started!
II. What Type of Shower Pan Do You Need for Tile?
Choosing the right shower pan for a tiled shower floor is essential for ensuring proper drainage, durability, and long-term waterproofing. The ideal shower pan should be compatible with tile installation, support efficient water flow, and prevent leaks or pooling issues. Factors such as material, design, and ease of installation play a crucial role in selecting the best option for your shower.
- A tiled shower floor installation demands a shower pan with a linear drain design that helps tile support and provides efficient water drainage. The best options include:
- Traditional shower pans already contain built-in slopes to ensure water drains toward linear drain systems.
- Custom Mortar Bed Pans require notable skills since they let users customize their shower pans through traditional techniques.
- The lightweight, waterproof foam shower pans with linear drains arrive at the store with built-in waterproof protection for easy setup.
Pre-sloped or waterproof foam shower pans with linear drains are the most effective options because they offer simple installation and reliable waterproofing features.
III. Step-by-Step Installation Guide
Installing a shower system requires precision and attention to detail to ensure long-term functionality and durability. Whether you are a DIY enthusiast or a professional, following the correct steps will help prevent common issues like water leakage, drainage problems, and structural weaknesses. This guide outlines the essential steps for preparing the subfloor, installing plumbing, creating the shower base, and waterproofing the floor. By following these steps carefully, you can achieve a well-installed, efficient, and long-lasting shower system.
Step 1: Prepare the Subfloor
- Any installation must begin with cleaning and attaining stability and levelness from the subfloor surface.
- A thorough inspection must show that the subfloor exists without signs of corrosion, structural weakness, or damage. Replace any damaged sections.
- You should identify the precise drainage spot by marking the area clearly.
- When the foundation is not flat enough, use a self-leveling compound to create flatness. A subfloor that slopes gradually downward will cause water to pool.
Step 2: Install Plumbing
- Running water through the drainage system is essential for maintaining your shower’s operation.
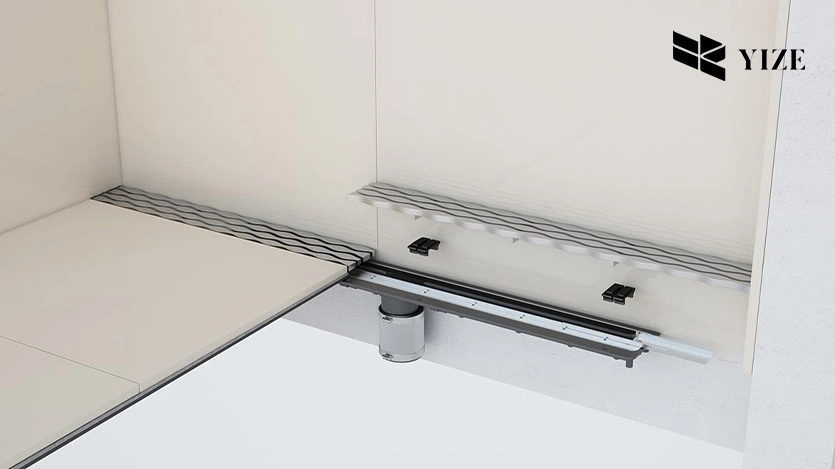
- Adjust the linear drain to match the notations that identify its lowest point installation position.
- The linear drain installation continues with proper attachment to the waste line using PVC cement and a secure, tight bond.
- Before continuing, a tiny water test should be performed to check for proper drainage and solve any water flow problems.
Step 3: Create the Shower Base
- The shower structure starts taking form during this stage.
- Mortar spreading should be performed to create a pre-slope leading toward the drain system.
- Follow pre-fabricated shower pans with linear drain manufacturer guidelines when setting the system and verify tight fittings.
- The base requires complete dryness before advancing in the project.
Step 4: Waterproof the Shower Floor
- Waterproof protection plays an essential role in stopping leaks and mold growth.
- The entire pan surface, together with the wall areas, must receive a waterproof membrane made of either liquid or sheet material.
- Apply waterproofing tape at all corners while paying additional attention to seams where the tiles meet.
- Before moving forward, check the area for leaks by filling the pan with water.
Step 5: Install Tile
- Bringing your shower floor to vibrant life requires tiling it now.
- Dry-fitting tiles first will help you find the most suitable tile arrangement.
- Use a notched trowel to spread the thin set across the shower pans with a linear drain before installing the tiles.
- Position the tiles carefully while pushing them into the desired slope towards the linear drain.
Step 6: Grout and Seal
- The finishing work begins after positioning all tiles.
- The rubber float enables you to fill tile spaces appropriately.
- Before the grout becomes hard, remove all remaining pre-settled products.
- Sealing the grout takes place after it has achieved complete dryness.
Step 7: Final Touches
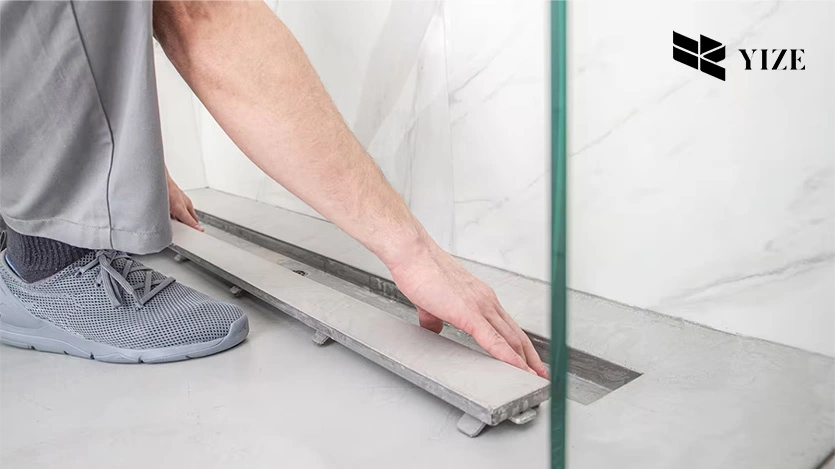
- Finishing your installation requires you to secure all components before achieving a glossy appearance for your shower.
- Last, install shower plumbing components in their designated places.
- The last step includes examining all seals and performing tile cleaning for ultimate shine.
- The shower drainage will be inspected to allow water flow and observe water evacuation performance.
IV. Conclusion
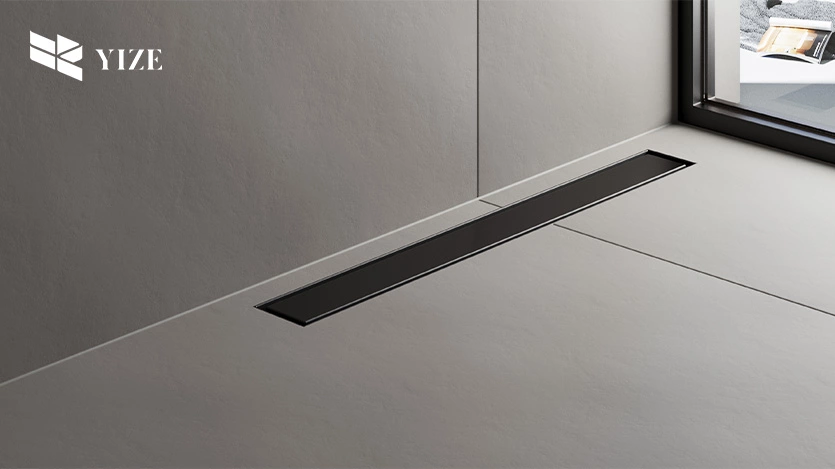
Putting shower pans with linear drains will provide both useful features and decorative value to your bathroom space. Properly installing shower pans with linear drains includes careful execution of each step from subfloor prep through waterproofing after which you can apply tiles to achieve long-term leak protection. Devoting proper time to correct installation now will not only prevent future expensive maintenance needs but also create a contemporary restroom look. Take your tools to start your project.
Frequently Asked Questions (FAQs)
Q1: How much slope should a shower pan have?
Shower pans with linear drain must be constructed with a 1/4 inch declination per each foot length which points towards the drain to maintain efficient water drainage.
Q2: Do you need a flange for a linear shower drain?
Yes, for most waterproofing standards, a linear shower drain requires a flange, which acts as a water barrier and ensures a watertight installation. However, some waterproofing techniques might not require a flange, so always check the drain’s manufacturer’s guide.
Q3: Do I need to waterproof under a shower pans with linear drain?
Absolutely! A waterproof barrier positioned under and around the shower pan secures the pan from leaking and stops extended water damage.
Q4: What is the best tile for a shower pan?
Tiles that are sized small with surface textures provide better capabilities for friction and prevent slip accidents.
Q5: How long does it take to install a shower pan with a linear drain?
Professional shower pan installation, together with waterproofing duties and tile placement, requires 2 to 3 days of work time, with drying periods included.