I. Introduction
A shower channel drain stands as an essential bathroom component to achieve sleek functionality along with easy home maintenance. Strategic planning combined with effective execution lets you create professional-grade outcomes without introducing unnecessary sink hassle. This guide provides detailed instruction on shower channel drain installation procedures and essential maintenance and troubleshooting guidance. This comprehensive guide also explains the reasons YZDRAIN has become a trusted name for indoor drainage solutions.
II. How to Install a Shower Channel Drain in 10 Steps
1. Choose the Location
Installation of a shower channel drain begins with selecting the proper drainage position. An effective water flow requires strategic drain positioning during installation. Most people choose to install their shower drains at either the exact middle point or a single wall side. Consider factors like:
- The drainage efficiency depends on maintaining proper floor sloping which guides water toward the drain.
- Builder accessibility for connecting the drain pipes to the system.
- Pre-design the drain location by making its dimensional marks before undertaking your work.
2. Prepare Your Work Area
You need to remove all refuse from the work area before starting installation. A reliable surface remains free of obstacles because of this technique. Plastic sheeting and masking tape should protect neighboring boundaries before installation activities. Rotten shower tiles need removal followed by complete cleaning of underlying surfaces when renovating. Surface smoothness at this point will help avoid later problems.
3. Calculate the Height of the Shower Drain
All shower drain heights must correspond with how thick your different tile and waterproofing installations measure. A majority of channel drains offer adjustable legs along with spacers which help users set the correct drain height. Level usage must establish complete horizontal alignment because drainage efficiency depends heavily on drain horizontal placement.
4. Place the Built-in Set
A shower channel drain features an integrated framework which maintains the drainage structure. Make sure to place the built-in set exactly where your height measures meet so it matches perfectly. You should follow manufacturer guidelines to secure the set using either screws or adhesive techniques. Verify the built-in set remains at the correct height and alignment which matches the intended shower floor slope.
5. Connect to the Drainage Pipe
Connect the drain network with extreme caution to the system of existing plumbing pipes. A high-quality pipe connector forms a watertight bond. Proceed by confirming security of the connection then verify drain performance by adding water through the pipe. A proper seal at this point stops leaks which inevitably require expensive future repairs.
6. Create a Sloped Floor
Water drainage requires a properly engineered floor slope that leading water to exit points. A standard slope range for drainage systems should be between 1 and 2 percent. Install a sloped floor using mortar beds or self-leveling compounds by applying layers from inner shower borders to the drainage area. Finish the surface normalization before waiting for complete drying.
7. Watertight Installation
Waterproofing serves as an essential requirement for every shower construction. Apply waterproof membrane across the entire shower floor and extending fully beyond the confined shower area on walls. Make sure the waterproof membrane strongly attaches itself to the drainage area. Use the product manufacturer’s instructions to determine when to start and finish each operation.
8. Place Your Bathroom Tiles
Vulnerable surfaces should be covered with tiles to finish the waterproofing process. Use a flat paddle to spread tile adhesive that covers the entire shower floor surface. Trim the tiles into shape so they fit properly near the channel drain while you arrange them in their final position. Spacers create uniform spacing throughout the areas for grouting. Follow product guidelines to let the adhesive cure completely prior to continuing work.
9. Seal the Shower Drain
After installing shower tiles apply silicone sealant along the channel drain edges to form a waterproof barrier. A proper seal prevents water infiltration to the substrate which leads to long-term damage. An appropriate tool or your finger will smooth the sealant while creating a professional-looking finish.
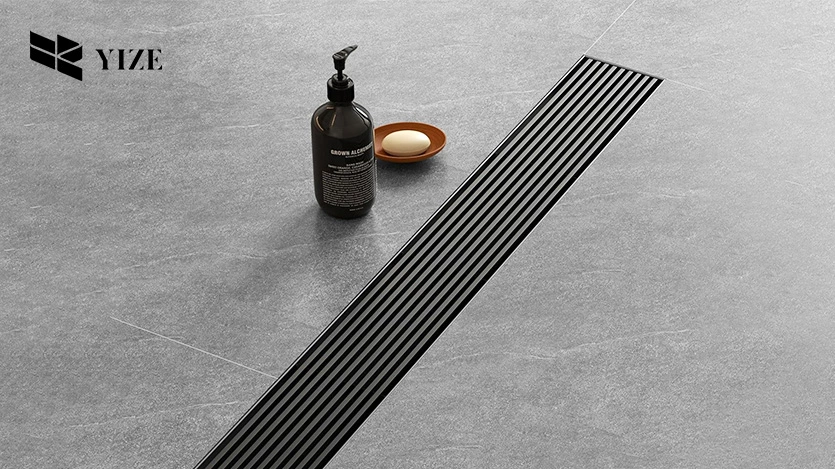
10. Place the Grate Cover
You should now set the grate cover in position over your channel drain. The installation of grates often works by automated snap-on system while selected models need to be secured with screws. Slightly tilt the shower grate to ensure it touches the tiles perfectly. Apply a drainage test by using water flow while checking for leaks or standing water.
III. Cleaning and Maintenance
The foundation of your shower system begins with installing the shower channel drain. Scheduled upkeep maintains drain longevity by stopping usual equipment deterioration.
1. Regular Maintenance Tips
- Clean the grate regularly: Clear all hair along with all soap scum and debris that builds up on the grate.
- Flush the drain: Running hot water into the drain once per month can help stop the formation of clogs.
- Check for leaks: Examine the drain seal periodically for signs of deterioration to verify it stays sealed immediately.
2. Troubleshooting Common Issues
- Slow drainage: Most clogs cause this problem. You should employ either drain cleaning solution or plunge the pipe to clear items blocking the flow.
- Odors: Check the P-trap to ensure it contains water. Dry traps can lead to unpleasant smells.
- Leaks: Silicone material should be used to patch any water seepage noted around the drain.
IV. Why Choose YZDRAIN?
The core offering of YZDRAIN consists of premium indoor drainage elements engineered to deliver long-lasting performance and outstanding durability. Here’s why YZDRAIN stands out:
- Precision Engineering: The products undergo precise design to provide simple installation together with maximum opnce: Our drain designs come with removable grippable components that simplify cleanintimal water flow.
- Durable Materials: YZDRAIN channel drains incorporate high-performance corrosion-resistant materials that guarantee extended lifetime usage.
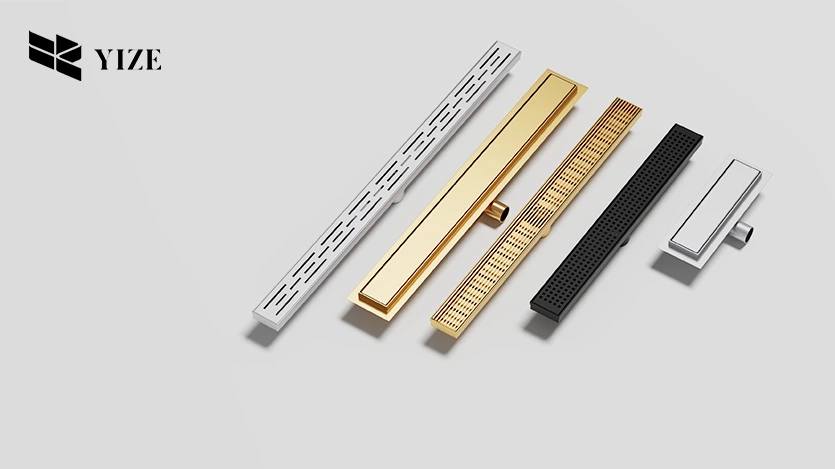
- Customizable Options: The product selection includes multiple design options and multiple dimensions catering to diverse bathroom design types.
- Easy Maintenance: YDRAIN offers you a product selection which marries design benefits with operational effectiveness.
V. Conclusion
A shower channel drain installation process remains straightforward for anyone to handle. Learn how to maintain a functionally pleasing bathroom layout by applying these 10 combined steps to your design. Homeowners along with professionals choose the high-quality indoor drainage system YZDRAIN as their preferred option. A reliable shower drain investment will provide years of quality performance for your shower drainage system.
Frequently Asked Questions (FAQs)
Q1. How do I know where to place the shower channel drain?
When choosing the location you should examine how the floor slopes along with your ability to reach plumbing systems.
Q2. How frequently should I clean my shower drainage system?
Regular drain cleaning after every two weeks helps both avoid pipe clogging and ensures uninterrupted water flow.
Q3. Can I install a shower channel drain on my own?
Yes, with the right tools and guidance, DIY installation is possible. However, consult a professional if you’re unsure about plumbing connections.