Introduction
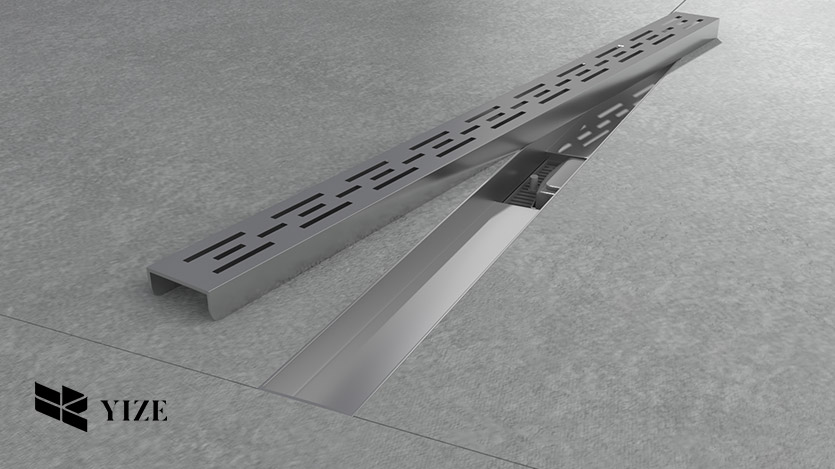
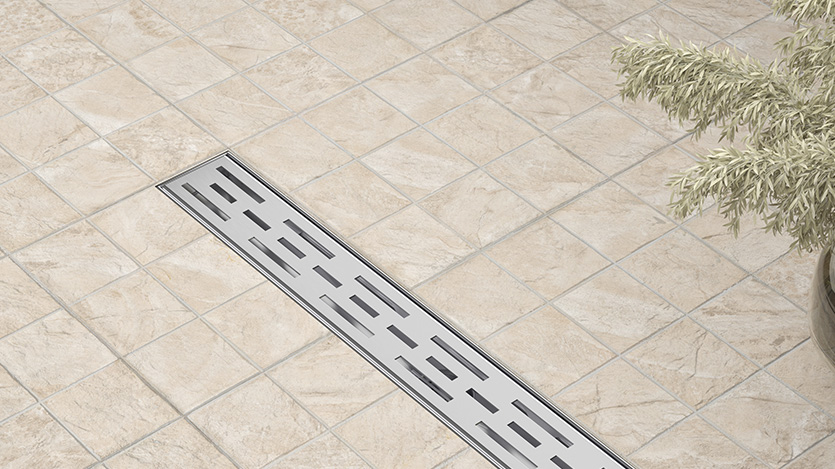
Tile slot drain is relatively new and contemporary shower drainage systems. In contrast to conventional centre drains, tile slot drains are elongated and thin, integrating themselves into the shower floor mosaic. They both serve to enhance the looks of the bathroom and come with practical benefits that make them ideal for modern showers. It is essential that they are set up adequately to perform as they should, and to retain their discreet appearance.
How Do Tile Slot Drains Work?
Tile slot drains are specifically meant to offer concealed and effective drainage to showers. They include a groove that is used to gather water and guide it to the drainage channel. A tile slot drain is mainly used to control water flow and, at the same time, help in giving a neat look. Here are the advantages over traditional shower drains:
- Aesthetic Appeal: Tile slot drains are ideal because they are concealed in the shower floor and give the bathroom a beautiful appearance.
- Improved Water Flow: They are wider and intended to take a large amount of water to minimize the formation of pools of water.
- Reduced Clogging: The linear design also aids in the prevention of clogs because the deign enables free flow of water as opposed to round drains.
Benefits of Using Tile Slot Drains
Aesthetic Advantages
- Seamless Integration: Another advantage is that tile slot drains can be mounted at the level of the shower floor tiles, which gives a continuous and invisible appearance.
- Modern Design: They belong to the group of modern and minimalist bathrooms and are ideal for new constructions as well as renovations.
Functional Benefits
- Improved Water Flow: Tile slot drains are more suitable for showers and have higher water flow rate so that water does not accumulate in the showering area.
- Reduced Clogging: It makes it easy for clogs to be avoided and the design of the tubes in a linear manner minimizes the chances of debris accumulation.
How to Install the Tile Slot Drain in the Shower?

Tools and Materials Needed for Installation
- Tile slot drain kit
- Measuring tape
- Level
- Pencil or marker
- Saw (for cutting tiles)
- Drill
- Screwdriver
- Waterproof membrane
- Mortar or thin-set
- Tiles
- Grout
- Sealant
- Hand tools (wrenches, PVC pipe cutter, etc. )
Instructions on Tile Slot Drain Installation
1. Preparing the Shower Floor
- Measure and Plan: Identify the location of the shower and the location of the tile slot drain so that it can be measured. See to it that the drain is considered to be placed at the lowest portion of the shower floor for proper water flow.
- Mark the Placement: Then, with a pencil or a marker, draw a circle in the proposed area where the drain is to be installed.
- Prepare the Substrate: Make sure that the type of floor you choose for shower is neat and has a flat surface. To ensure that there is a good surface to work on, one may have to apply self-leveling compound on the area.
2. Installing the Drain Body
- Cut the Opening: Saw the shower floor as provided by the outline that has been made on it.
- Place the Drain Body: Place the drain body in the position that is required in the opening. Make sure that it is installed in such a manner that it fits properly on the floor of shower.
- Secure the Drain: Screw the drain body as lock washers onto the base by turning the nuts with washers clockwise. Check that it is firmly set and parallel to the ground.
3. Connecting the Drain to the Plumbing
- Attach the Drain Pipe: Screw the drain body into place by connecting the drain body to the existing plumbing in the proper manner. It will enhance the security of the joint and also guarantee that it does not leak.
- Test for Leaks: However, first assume water through the drain pipe to solve this problem and find out if there is any leak. In the case of 戉ैं, try to stop the leaking before moving on.
4. Tiling Around the Drain
- Apply Waterproof Membrane: It helps to install the tile beneath the drain and on the flooring of the shower with a waterproof membrane.
- Mix Mortar or Thin-Set: Mix the mortar or thin-set for tile installation as described in the manufacturer’s guidelines.
- Lay the Tiles: Start tilaing at the drain area making sure that each tile is fitted to the body of the drain. Level the ground to make sure the tiles are flat before gluing them.
- Allow to Set: Allow the mortar or thin-set to cure for the length of time recommended by the manufacturer before grouting.
5. Sealing and Finishing Touches
- Grout the Tiles: Spread the grout in-between the tiles, ensure that they make full use of it to close any seams that might be present. So, remove the surplus grout with the help of a damp sponge.
- Seal the Grout: After you have set the grout it is advisable that this be sealed in order to guard against moisture and staining.
- Final Inspection: Inspect the installation for any flaws that would require fine tuning. Check the functionality of the drain and make sure there is no leakage to cause water damage.
What Common Mistakes to Avoid During Installation?

Pitfalls to Watch Out For
- Improper Slope: It should be noted that the floor of the shower should be sloping towards the drain to avoid water accumulation.
- Incorrect Alignment: To do this, you should ensure that the drain body has the correct orientation and that it sits flat on the shower floor.
- Poor Waterproofing: Use a type of barrier to ensure that the subfloor does not get damaged by water.
Tips for a Successful Installation
- Follow Instructions: Referral should be made to the manufacturer’s installation instructions and followed to the letter.
- Double-Check Measurements: Passage planning should be marked accurately so that in this case you should first measure twice and cut once.
- Test for leaks: It is very important to check the plumbing connections for signs of leakage before fixing them.
Why Choose YZDRAIN’s Tile Slot Drains
YZDRAIN has a series of high-quality tile slot drains that meet the requirements of the new type of bathrooms. They are associated with a strong and functional product that comes in an attractive and appealing package.
Here are some unique features and benefits of YZDRAIN’s offerings:
- Durable Materials: Thus, our tile slot drains of YZDRAIN are made of high-quality stainless steel for its anticorrosion.
- Innovative Design: Their drains do not look like drains at all since they are basic and simple fittings that complement any shower flooring system.
- Easy Installation: YZDRAIN gives elaborative installation procedures and assistance to ease the process for both the contractors and users alike.
- Efficient Water Flow: Their drains work with high water flow rates since they are made not to allow water to pool thus they do not clog easily.
- Warranty and Support: Customers using YZDRAIN products are provided with quality warranties and outstanding customer service, which makes them feel relaxed.
Conclusion
This article seeks to explore how incorporating a tile slot drain in your shower area is likely to improve the functionality and overall appearance of your bathroom. By adopting the installation procedure, you will be able to have a properly installed drain that enhances the flow of water and, at the same time, gives the system a modern touch. If you want to achieve optimal results, it is recommended that you install YZDRAIN’s premium tile slot drains since they are reliable, competent, and offer exceptional customer service.
Frequently Asked Questions (FAQs)
Can I install a tile slot drain myself, or do I need a professional?
It is possible to install a tile slot drain by yourself but it is advised to seek the help of a professional plumber or tiler if you do not have experience in the installation of plumbing or tiling.
How do I maintain my tile slot drain to prevent clogs?
Ensure that the drain cover is cleaned and any debris cleared on a regular basis. It is also possible to use a drain cover with a strainer to avoid the formation of clogs in the drain.
Are tile slot drains compatible with all types of shower floors?
Tile slot drains can be installed on any type of shower floor, but it is advisable to seek the manufacturer’s guide to ensure compatibility with the floor type.
